Extract Data from PDFs Using Power Automate
Assumption
- You have a local SQL server database setup, with appropriate table to hold data.
- You have Power Automate desktop installed on your machine.
- You have multiple PDF files, each with multiple Tables embedded in them.
- Tables with information we want to extract are consistent across each file.
- Files exist in a single folder location.
- We want to insert the file name into the local database so that we can record.
Recommendation / Notes
- Create an identify column on your SQL table as this will allow you to see the order in which data has been extracted and inserted into the table.
- You should rename the variables created in each of steps outlined here to make it easier to use later in the process – the generic names created by PA are not particularly intuitive!
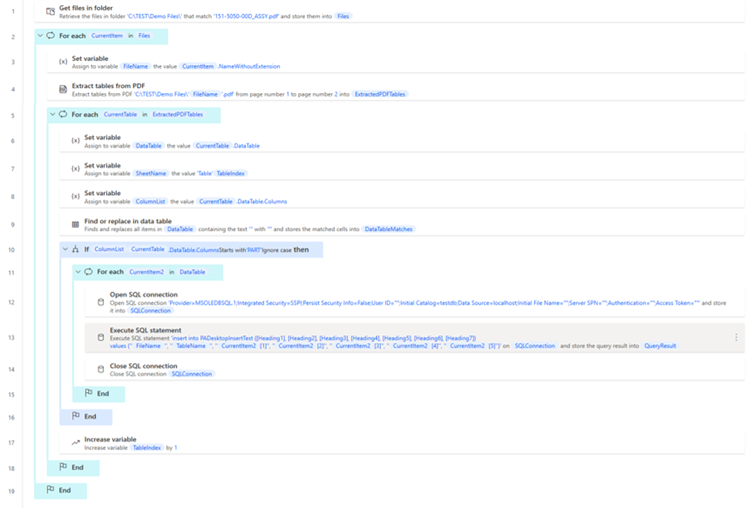
- Adding a for each / if statement will create a start and end point – you'll need to add the following steps inside of those loops. See the overall picture at the end to see how each step outlined here fits within the process.
- This process inserts the data into a SQL table, however if you're not familiar with SQL, it's fairly simple to insert the data into an excel table
1) Select the New Flow option and give it a name
2) Use “Get Files in Folder” option
In this example, we are looking for files in the Demo Files folder – the * is a wildcard, so it will look for any file that has a .pdf extension
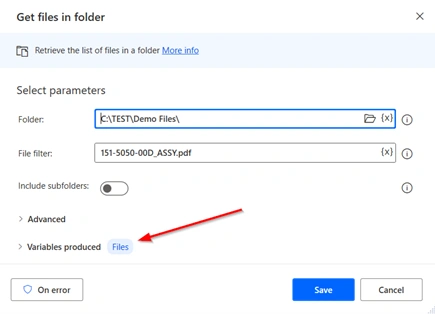
Please note how the this step produces a variable called “Files”. Lots of steps within a PA Desktop flow will generate a variable output, which can be renamed if you choose.
The output of this step will be a list of files that we can then loop through...
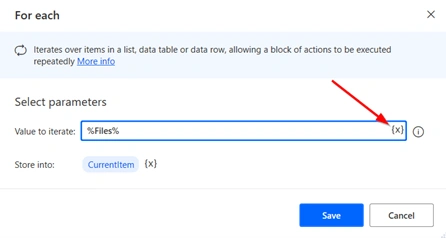
3) Use “For Each” action in to Loop through each file
Once we have extracted the list of files that we want to read, we then need to loop through each file and take actions. To do this, use the for each action, then click on the x option to bring in a variable and choose the “Files” option from the previous step:
4) Use “Set Variable” action to create FileName
Now that we have the file, our first step is to extract the name of the file we are currently dealing with and insert it into a variable so that we can use this later on. Again, use the variable button to see all the available variables, open the CurrentItem (assuming you did not change the name in the previous step), find the Name without extension option and choose that.
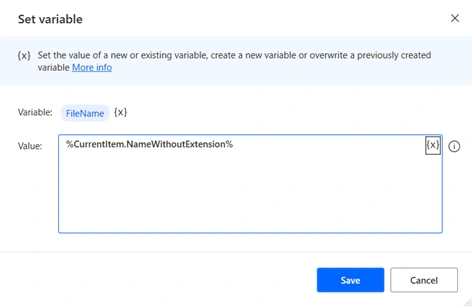
You probably also noted that there are a ton of options available under the current item – feel free to pull out any and all useful information about the file!
5) Use “Extract tables from PDF” action to get the datatable information
Next up, we need to use the extract table option to get the table data out of the PDF. This is the core part of this process – it's the step that actually gets the information you require. The process actually reads the PDF looking for what it considers to be a table, so as long as the table is structured, it should be able to pick it up.
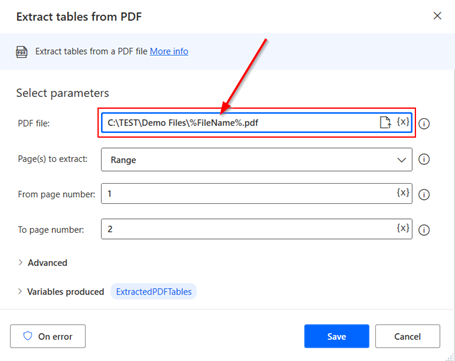
There is nothing particularly clever going on here from a setup perspective, except that you can see we pass in the file name variable from the previous step.
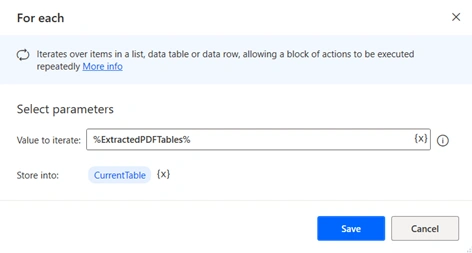
6) Use “For Each” action in to Loop through table in the current file
Now that we have the file and have extracted the tables, the next step is to loop through the tables in order to process the information contained within them. This is in essence no different from the first For each we used, except this time you are looping though the PDF table:
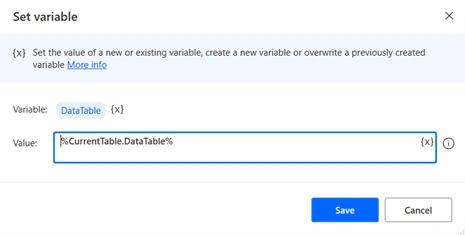
7) Use “Set Variable” action to create Datatable
Create a variable containing the datatable that has been extracted. This isn't necessary, however I personally find it easier to dump into a named variable, so that I can recall it later in the process.
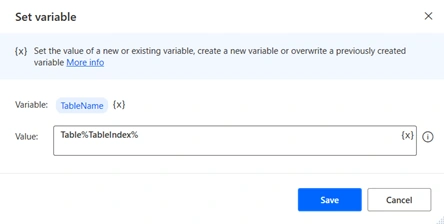
8) Use “Set Variable” action to create TableName
This is a variable that contains an incremented number identifying the table. Again, this isn't necessary, but it is useful to insert this into the SQL table as you can then work out whether you have correctly pulled all the tables you require from the PDF.
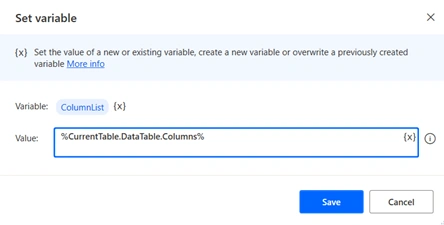
9) Use “Set Variable” action to create ColumnList
This is going be used later in the process to search the column headers and check that it's the table we want to process.
10) Use “Find or replace in data table” to clean up datatable
My example datatable contains ‘ within the text, which will cause the SQL insert to fail. I have therefore created a step here to strip out the ‘ and replace with an applicable character.

It's possible you will have such issues as well, so this step will enable you to strip any problem characters from your datatable – you can also do some simple cleansing of data in this way should you require.
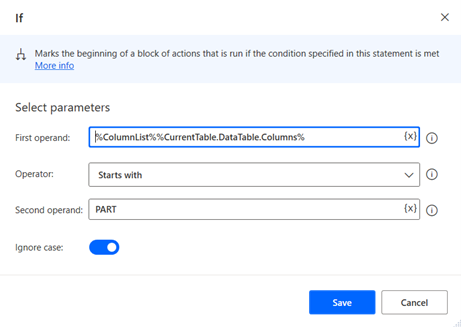
11) Use “If” to check it's the table you intent to insert
This step is again not strictly necessary. However, in my file, I have multiple tables, only one of which I am interested in. Therefore I am using an if statement to check whether the ColumnList variable contains the header columns for the table I want: If it does, I do the following, if not, I do nothing.
12) Use “For Each” action to loop through every item in the datatable variable
I now drop into a loop for every item (row) within the datatable. This means that the process will look at each item in the datatable and allow me to take an action on each item:
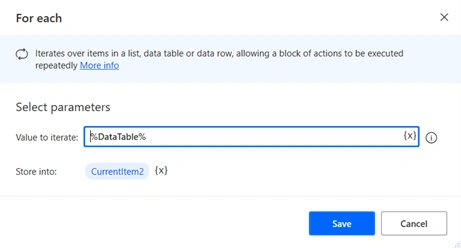
The only action we are going to take is to insert the data into a SQL table...
13) Use “Open SQL Connection” to establish connection to your database
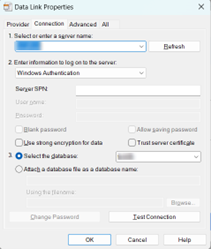
Open connection to your database using this action. To create the connection, click on the build connection string option:
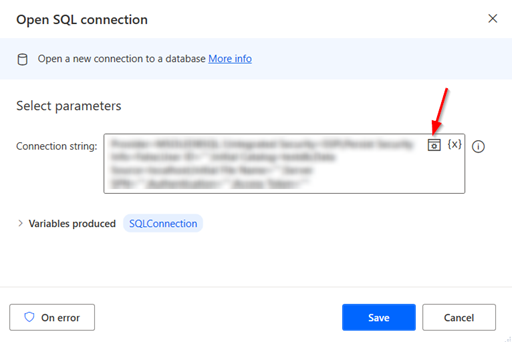
Then create the connection to your database:
14) Use “Execute SQL Statement” action to insert the item
With the connection string created, then build the insert statement using the values from the current item. This is what my insert statement looks like:
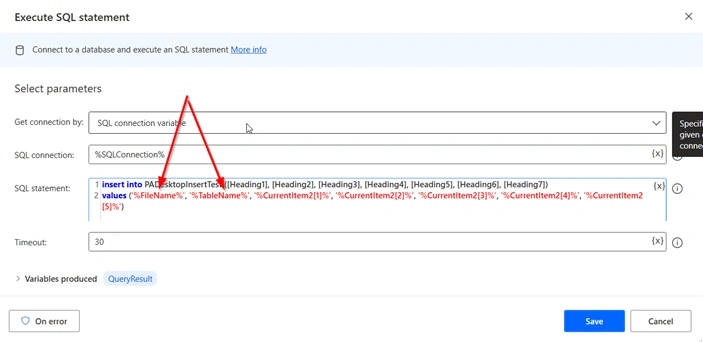
The arrows in the above point to the parameters that we have created earlier in the process and are using within the insert statement.
The other columns are populated using current item that we are looping on (see step 12 and the variable name created in that step), then the number in the square brackets [1] denotes the column from the item that we want to extract.
Please also note that the SQL syntax requires that the value to be inserted be enclosed in single quotes. Therefore, to insert the a value for the CurrentItem2 variable, it will need to look something like ‘%CurrentItem2[1]%'
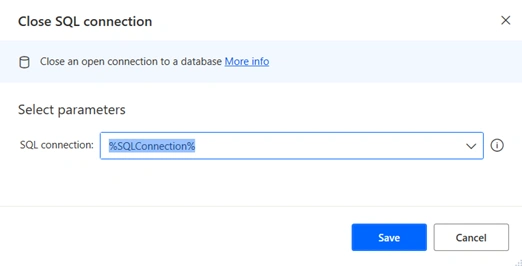
15) Use “Close SQL Connection” to close your connection to the database
Simple one this – close the connection!
16) Use “Increase Variable” action
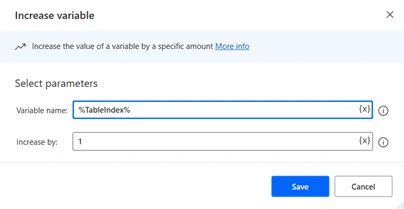
Finally, inside but at the end of the current table loop (Step 6 from the above), add an increase variable on the table index. This number is appended into the TableName variable (Step 8) so that we can keep track of the table being inserted into the SQL table. If you look at the query in step 14, the second value is this table name (‘%TableName%').
Full Process
